
AGILE CODEX USER GUIDE
Magento 2 Support Desk — User Guide
Use ACx Support to organize requests, assign agents and keep ticket conversations inside Magento Admin. This guide follows the currently installed interface and uses synthetic demo tickets.
1. Install and validate on staging
Back up your database and application. Confirm the package's required modules and PHP dependencies before copying the supplied files to app/code/Acx/Support. Follow the installation instructions supplied with your package and review other pending module upgrades before running setup commands.
php bin/magento module:enable Acx_Support
php bin/magento setup:upgrade
php bin/magento setup:di:compile
php bin/magento setup:static-content:deploy -f en_US
php bin/magento cache:clean config layout block_html
Use the supported PHP executable and deploy your storefront locales. Installation and compilation alone do not establish complete workflow compatibility. Validate tickets, attachments, permissions, notifications and customer access on staging.
2. Configure agent access
Magento admin permissions and Support department permissions are separate. First grant the required Support resources in System → Permissions → User Roles. Then review the module's department-access rules and agent membership.
Department isolation is not established by the demo. Test access with separate accounts before relying on department restrictions. Existing all-role rules may take precedence.
The demo role grants all installed Acx_Support:: resources plus Dashboard, Customers and related order-view resources. Magento user administration, unrelated system settings and order creation are excluded. Review any existing all-role Support permission rule: a global fallback can affect which departments an agent sees, even when a role-specific entry exists.
3. Set up a support team
- Open Customers → Support → Support Team.
- Create or edit a department.
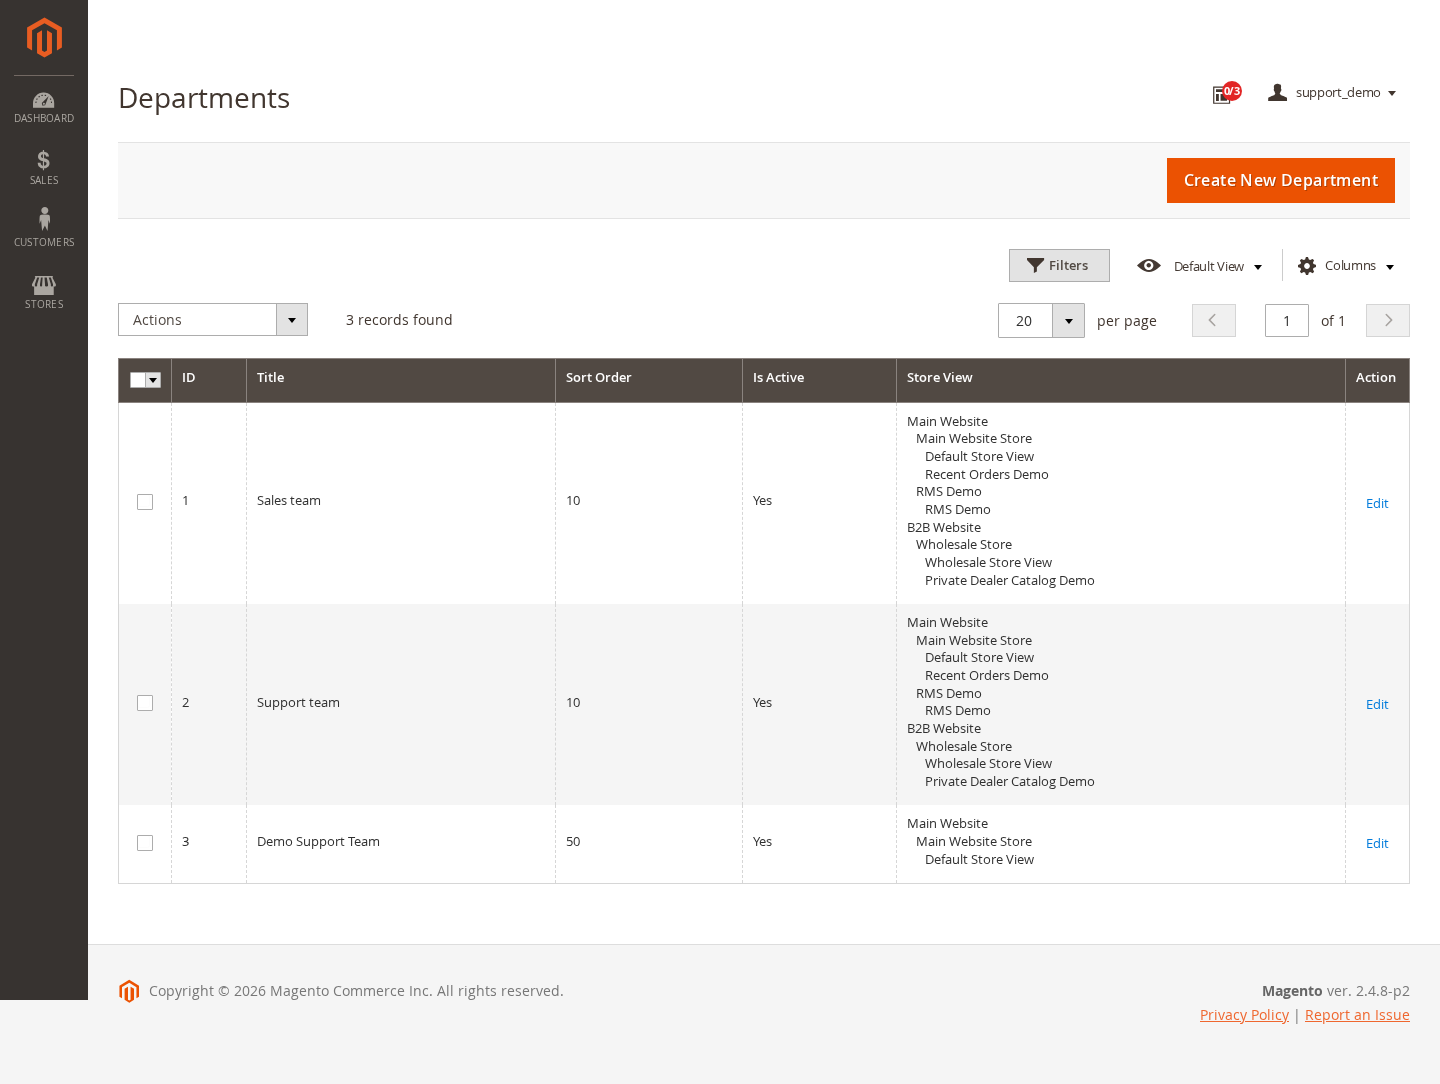
- Review its name, active status, sender identity, store views and agent membership.
- Choose frontend visibility and notification options appropriate to that team.
- Save, then verify that the expected team and agent appear in ticket assignment choices.
The demo uses Demo Support Team, assigned to the default store and the demo agent. Department notifications are disabled for this fixture.
4. Work from the ticket dashboard
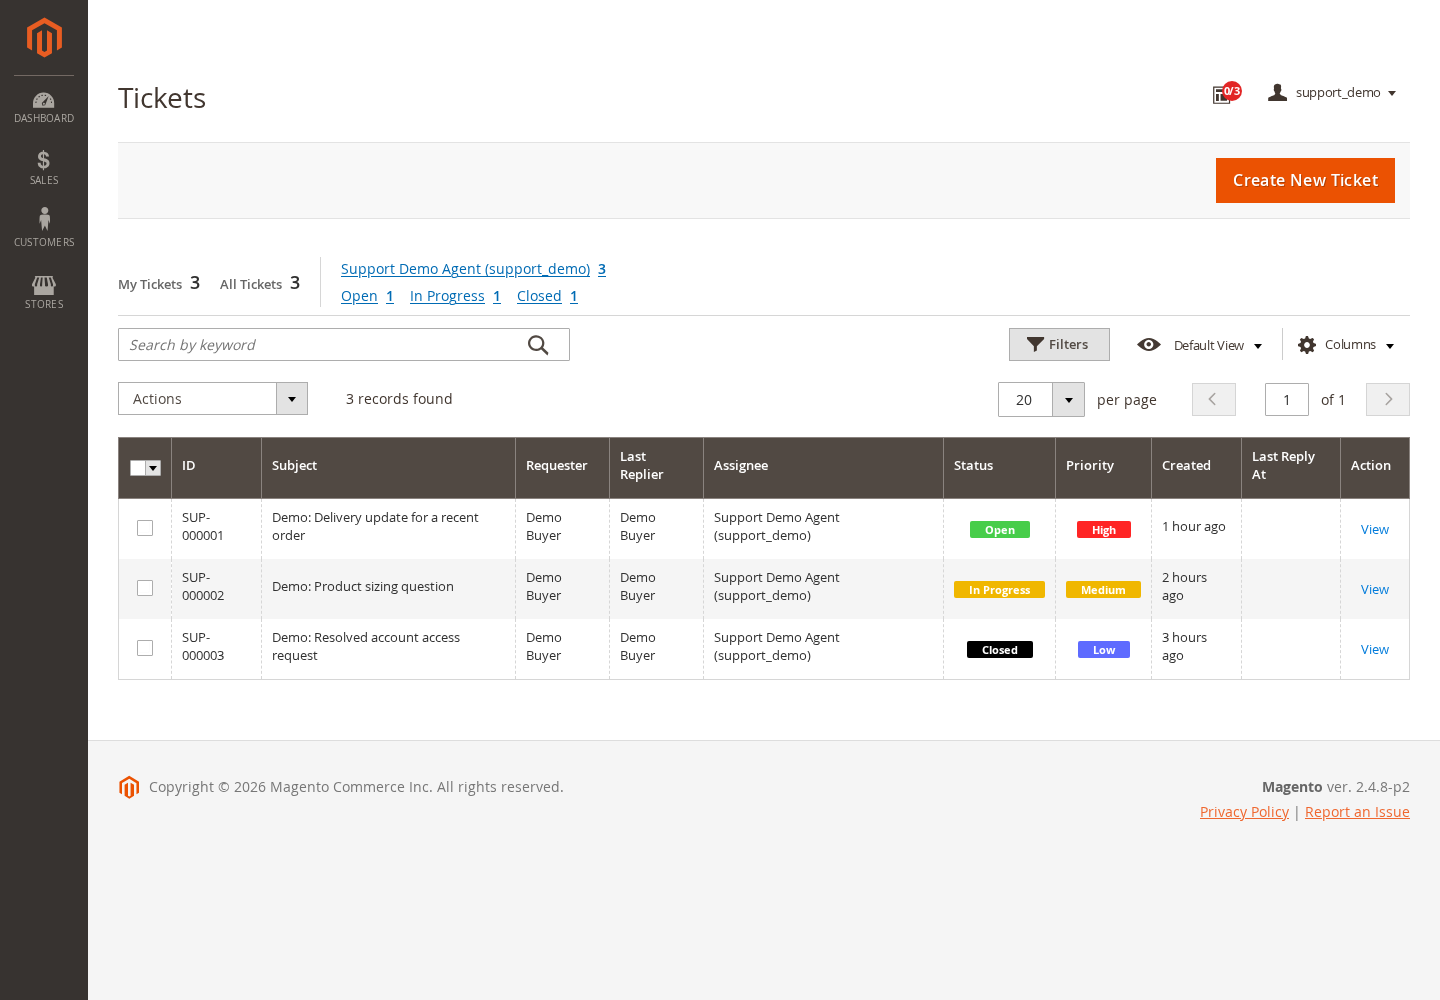
Open Customers → Support → Tickets. The dashboard shows My Tickets, All Tickets, agent counts and status filters. The listing includes the reference, subject, requester, last replier, assignee, status and priority.
- Select an agent or status filter to narrow the queue.
- Use the grid's Filters and Columns controls when needed.
- Choose View beside a ticket to open its workspace.
- Use Create New Ticket to begin an agent-created request. Review the customer, message, team, priority and status before saving.
New references use the SUP-000001 format. References are identifiers, not authentication credentials; existing ticket references are retained.
5. Review and reply to a ticket
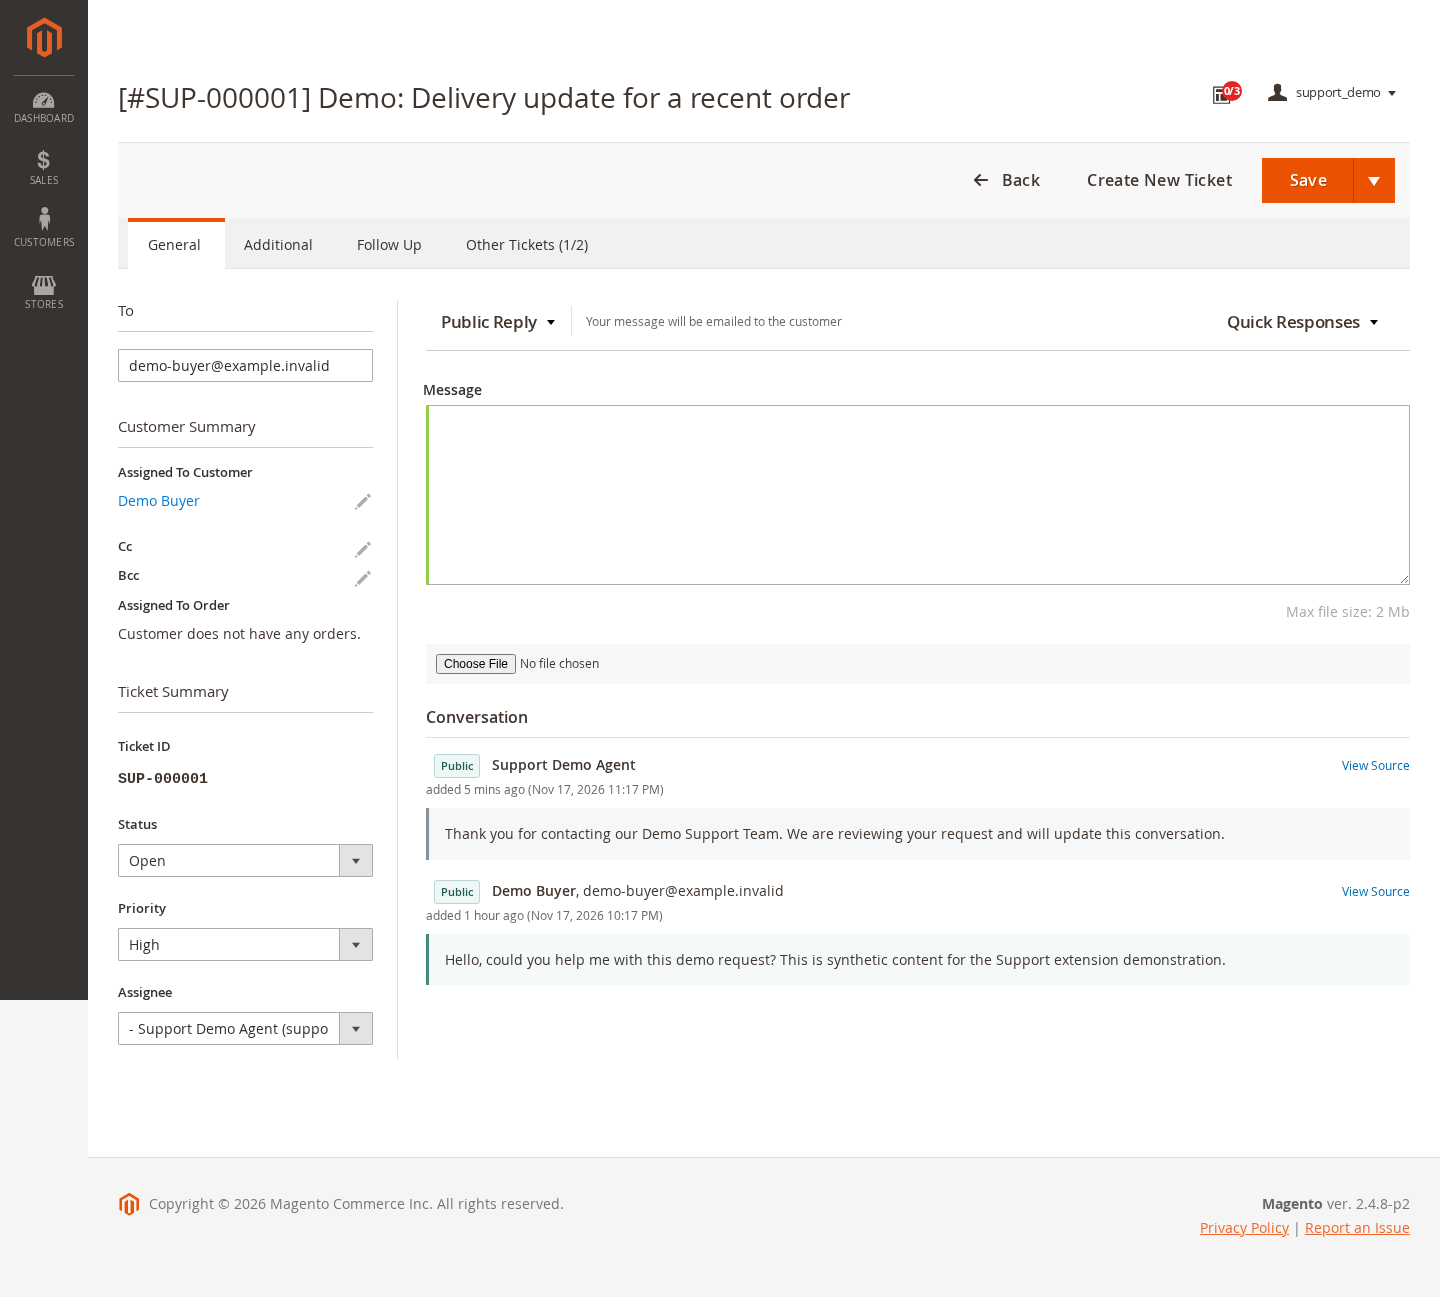
The General tab displays the customer summary and ticket details beside the message area. Review the existing conversation before responding.
- Confirm the recipient and customer context.
- Review any related order; a customer without orders has an empty order selection.
- Set the appropriate status, priority and assignee.
- Choose Public Reply for a customer-facing response or the internal-note option for staff-only communication.
- Write your message, optionally use an available quick response and attach only permitted files.
- Review the action and recipient before saving. Public replies may send email when delivery is configured.
Conversation entries show their visibility label, author and time. Additional and Follow Up tabs provide further ticket fields and follow-up controls. Their availability depends on the installed configuration.
6. Configure Support Desk
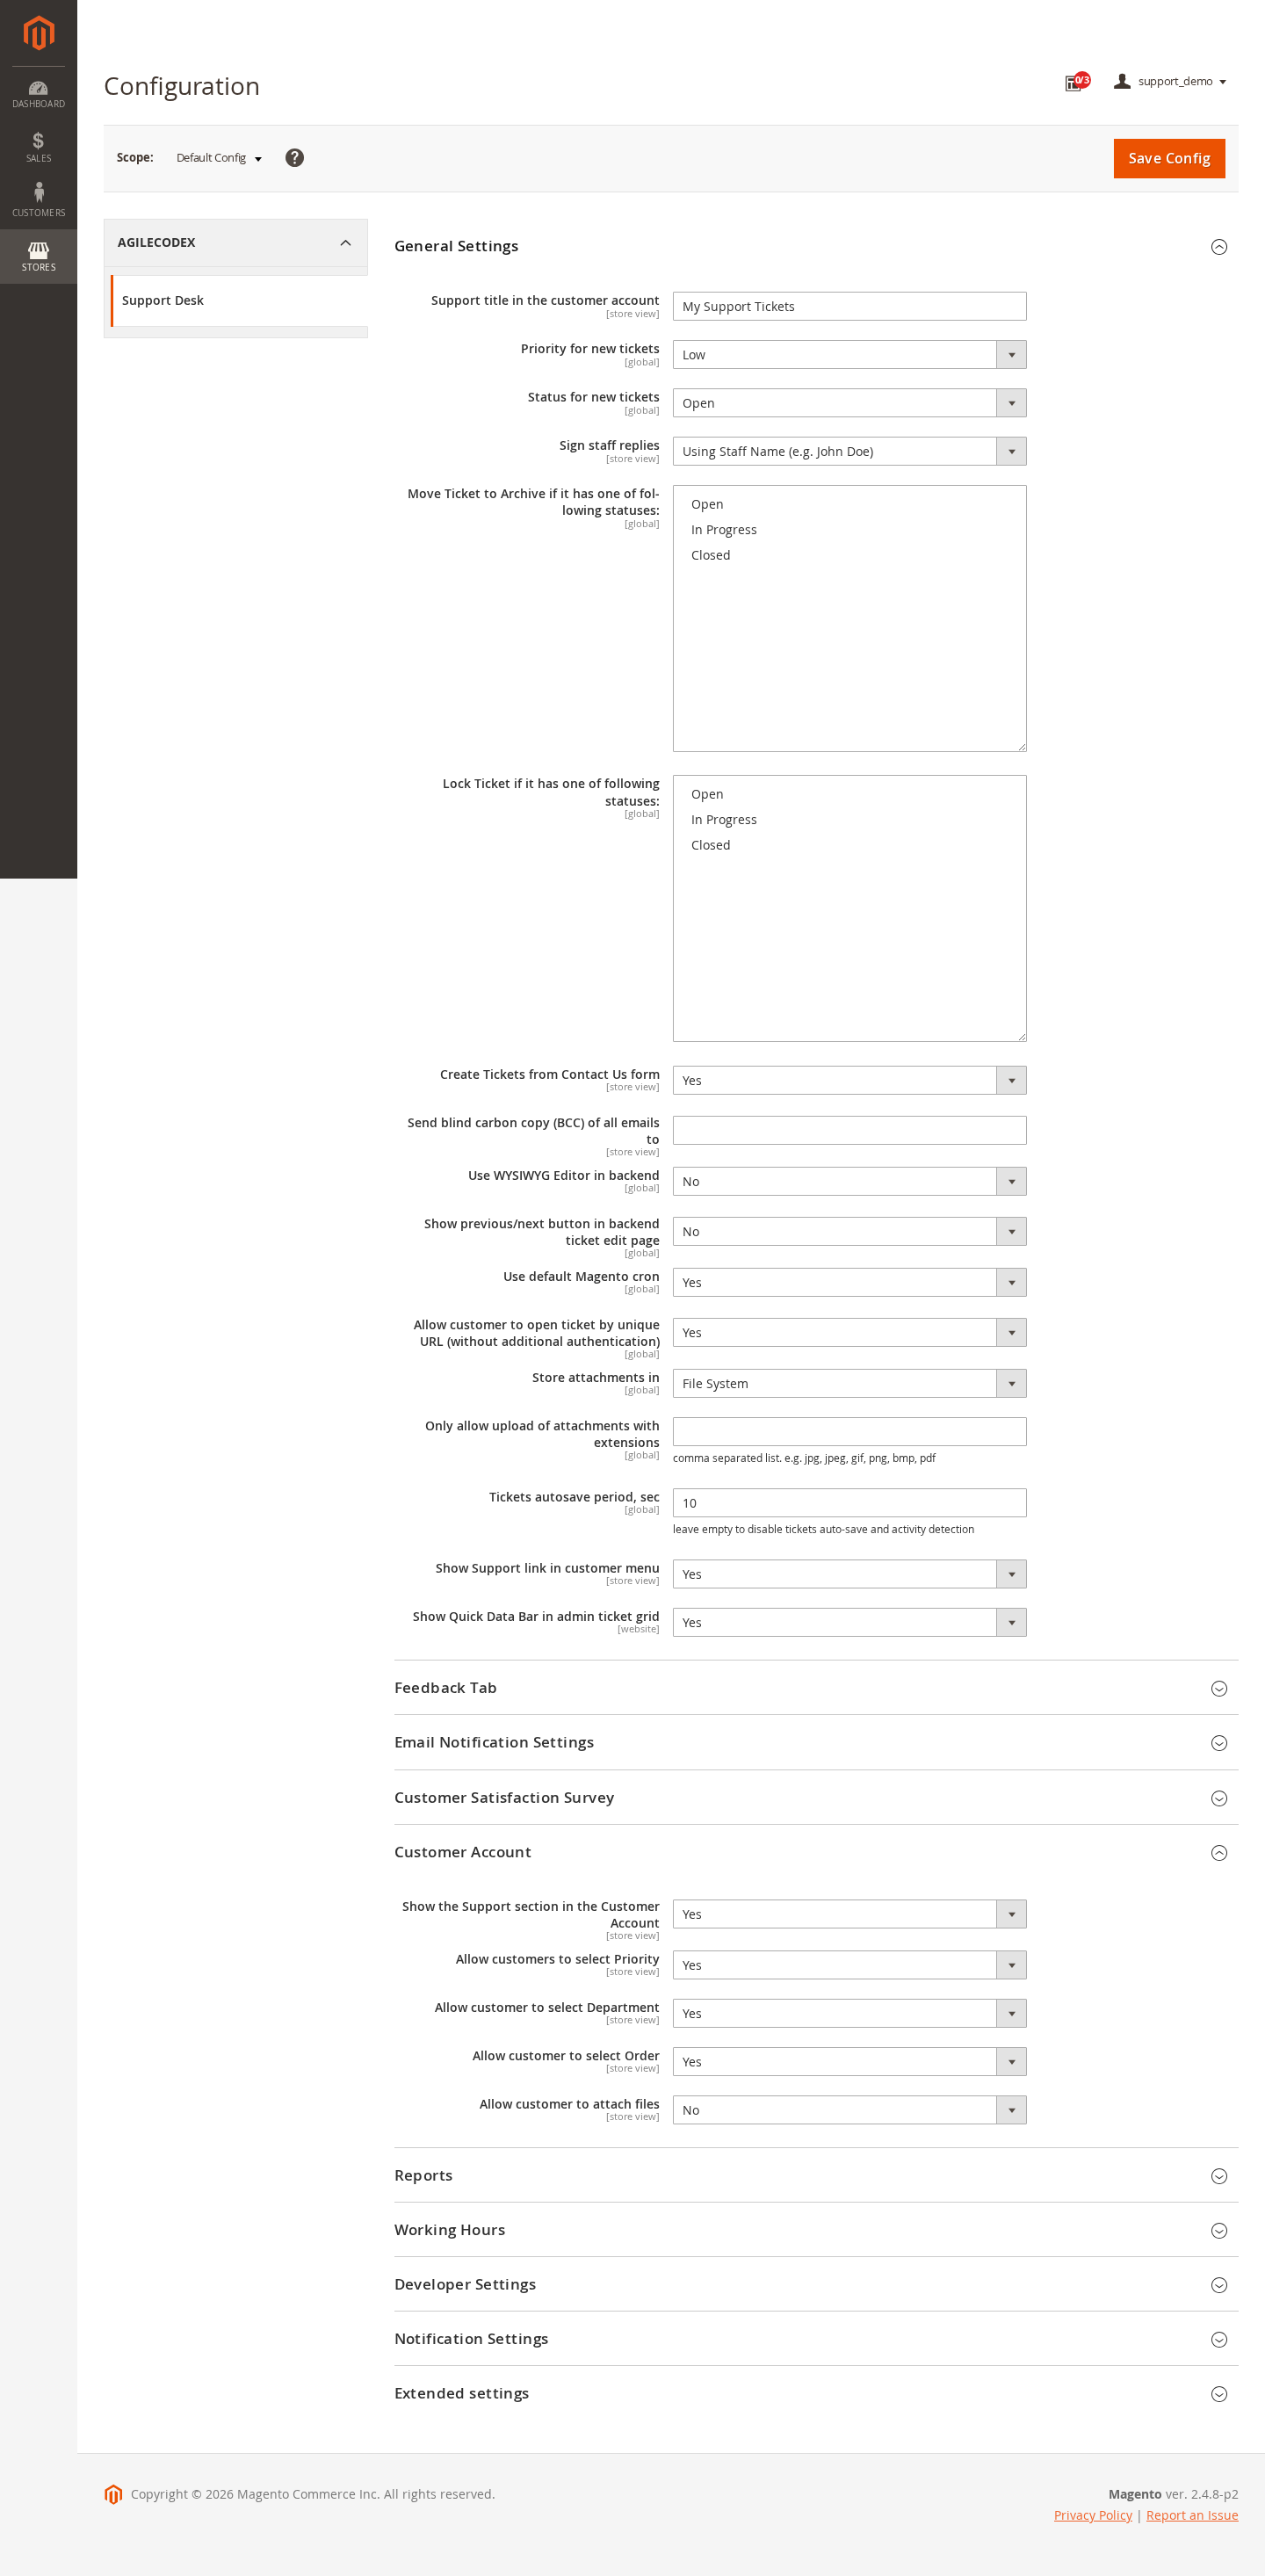
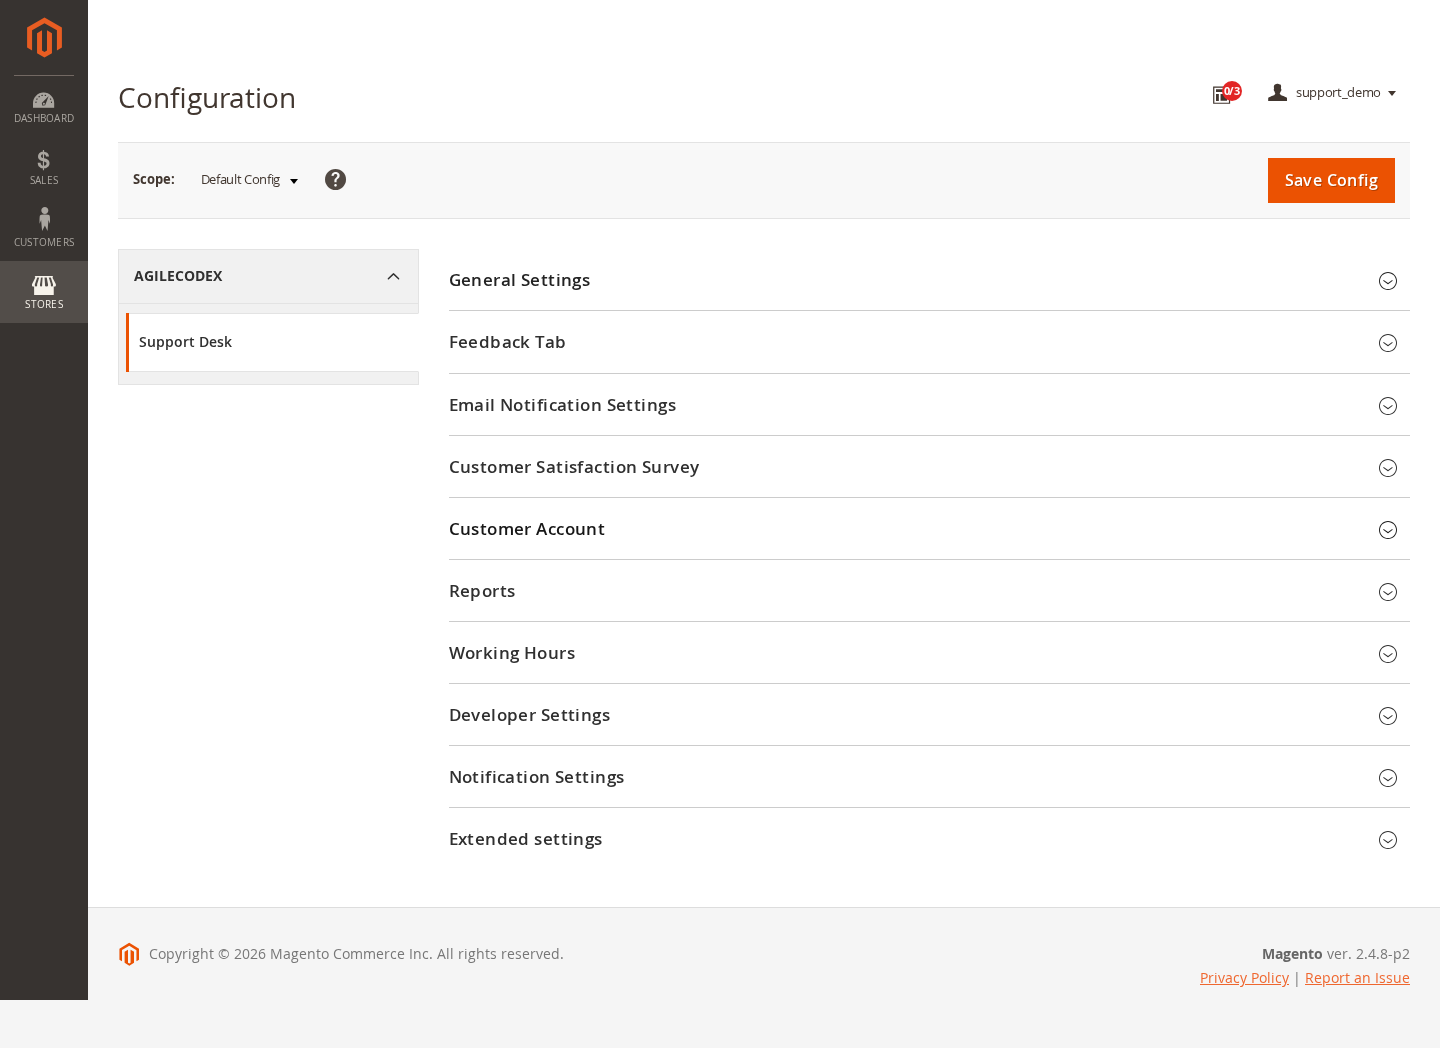
Open Customers → Support → Configuration, or Stores → Configuration → Agile Codex → Support Desk. Select the intended configuration scope before changing settings.
- General Settings: customer-account title, default priority/status, reply signature, archive and lock statuses, contact-form integration, allowed attachment extensions and draft autosave period.
- Feedback Tab: frontend launcher, target department, labels, position, attachments and customer-selectable fields.
- Email Notification Settings: templates and ticket-history details included in notifications.
- Customer Satisfaction Survey: visibility and notification options for feedback.
- Customer Account: customer ticket availability and optional priority, department and order selectors.
- Reports and Working Hours: operational display and schedule options available in the package.
7. Review the customer experience
Enable and configure the customer-account support area, then test it with a synthetic customer account. Verify that the customer sees only their own tickets, can create a request with the allowed fields and can read the intended public conversation. Test attachment access and customer/session boundaries separately.
The optional Feedback Tab can collect requests from storefront visitors. Enable it only for the intended scope, and test its form validation, CAPTCHA integration and department assignment before publication.
8. Email and advanced features
The package contains mailbox gateway, quick-response, custom-field, workflow-rule, satisfaction and reporting components. Configure and test these against your actual package and available admin screens. Do not assume that installing the module connects inboxes or enables a working mail service.
Use controlled mailboxes to validate incoming parsing, outgoing delivery, reply threading, signatures and attachments. Review cron, parser, IMAP, CAPTCHA and GeoIP dependencies where relevant. Screenshots and the synthetic demo do not verify these external integrations.
9. Test and troubleshoot
- Missing menu: check Support ACL resources and the Customers parent resource, then sign out and back in.
- No tickets: check filters, agent/team membership, store assignment and the separate Support permission rules, including global fallback entries.
- Missing assignee: add the agent to an active team assigned to the intended store.
- No email: check the team's notification choices, mail transport, templates, cron and gateway configuration using a test mailbox.
- Attachment problems: inspect extension allowlists, size limits, storage and download authorization.
- Unexpected visibility: verify public versus internal mode and customer access with separate accounts.
Try Support Desk Admin Demo. The tickets and messages are synthetic. Avoid submitting outgoing messages while exploring.
For assistance, contact support@agilecodex.com with your module version, Magento/PHP versions and reproducible steps.