How to Disable and Enable Magento 2 Cache

Jan 16, 2016 admin Magento 0 comments

Disabling Magento 2 Cache may be needed during development, because the developer can see the results of development changes without flushing the cache. However, disabling cache degrade performance.

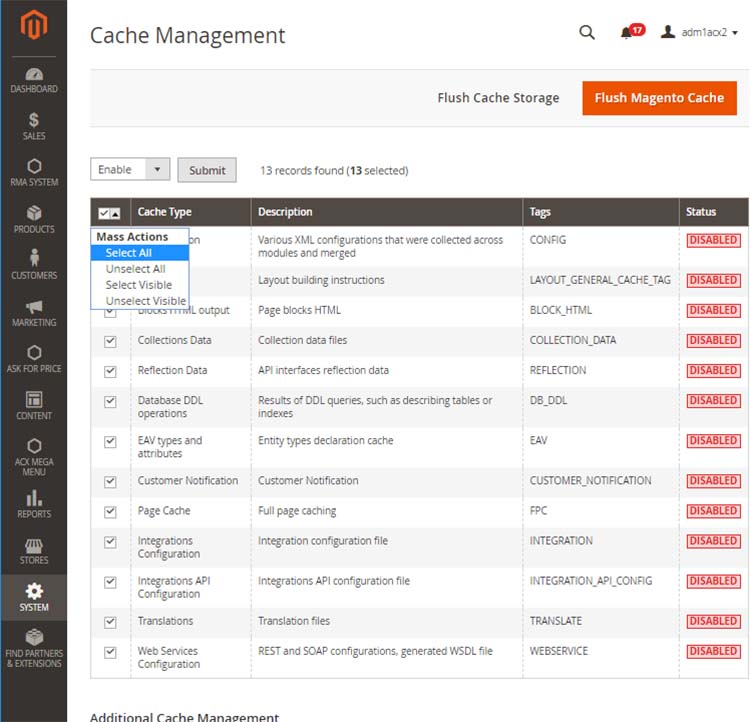
This article describes how to disable and enable Magento 2 Cache:

Login to Backend Admin:

  1. Log in to your Magento 2 backend Admin dashboard.
  2. Go to System menu at Left bar -> click on Cache Management.

How to Disable Magento 2 Cache:

After opening Magento 2 Cache Management page, do the following steps to disable Cache:

  1. Select “Select All” in “Mass Actions” dropdown list.
  2. Select “Disable” in “Actions” dropdown list
  3. Finally, click on Submit button.
Disabling Magento 2 Cache

How to Disable Magento 2 Cache

How to Enable Magento 2 Cache:

After opening Magento 2 Cache Management page, do the following steps to enable Cache:

  1. Select “Select All” in “Mass Actions” dropdown list.
  2. Select “Enable” in “Actions” dropdown list.
  3. Finally, click on Submit button.
enabling Magento 2 Cache

How to enable Magento 2 Cache

Alternatively, you can enable or disable Magento 2 Cache via the command line described in this topic.

Related Posts

Sorry, the comment form is closed at this time.

Let us know about your project!

We’d love to know more about your project and give estimation.